Visualize Data
Starting DV
Start DV with
Windows Double click the DV icon on the Desktop
macOS Double click the DV icon in the Applications folder
Linux Execute
dv-guiin the command line or selectDevelopment -> DVin the system menu
Select Visualize Project
Select the Visualize project in the left sidebar of DV.
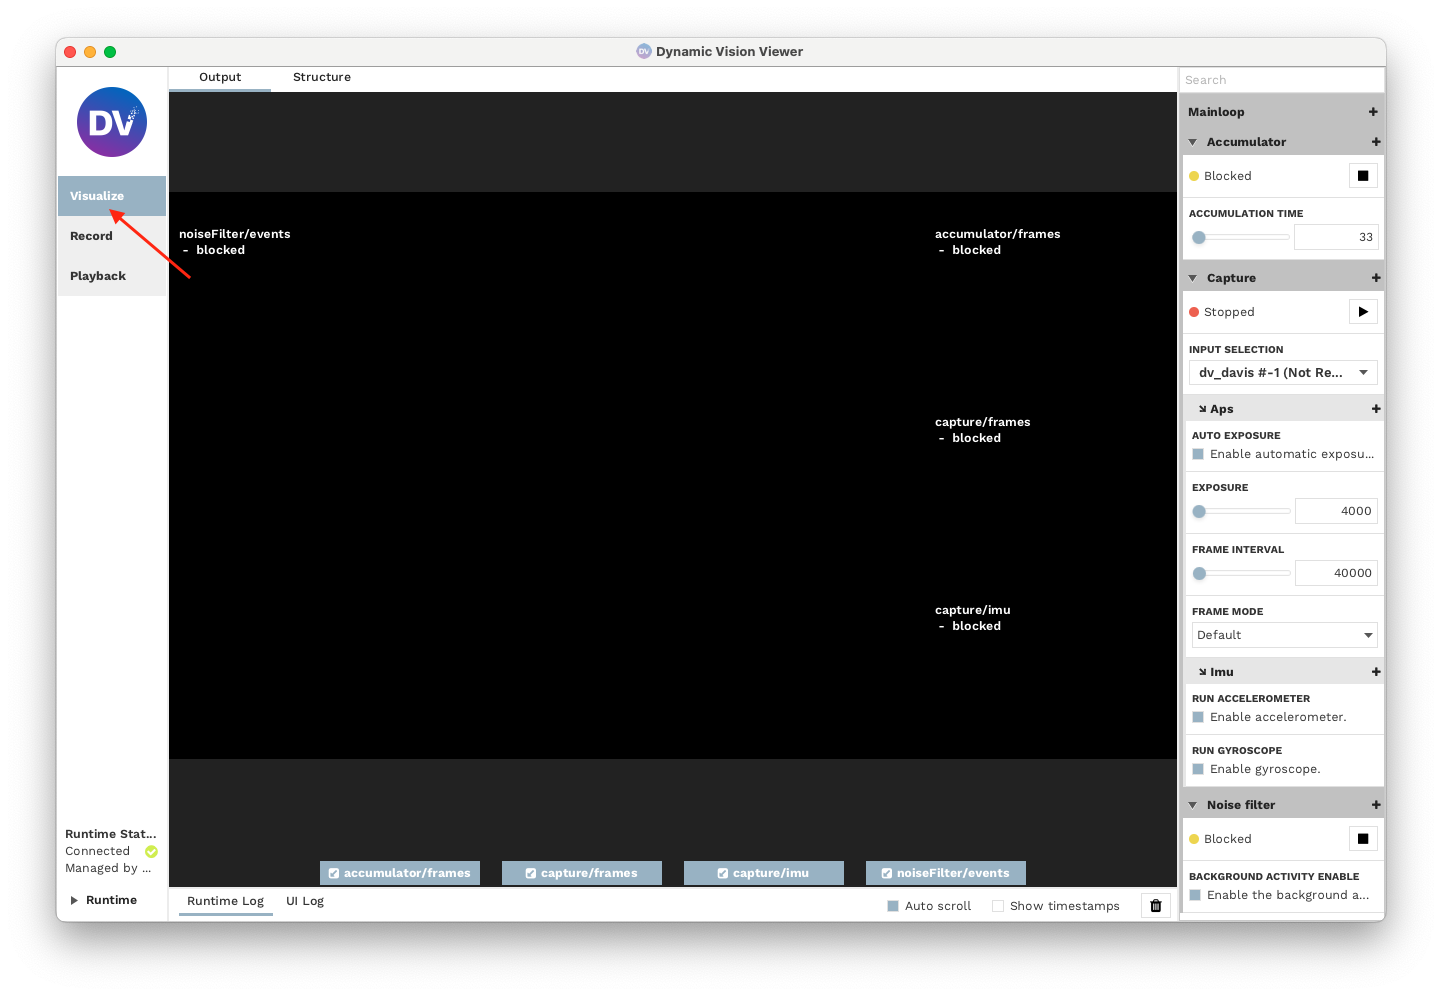
Select Input Device
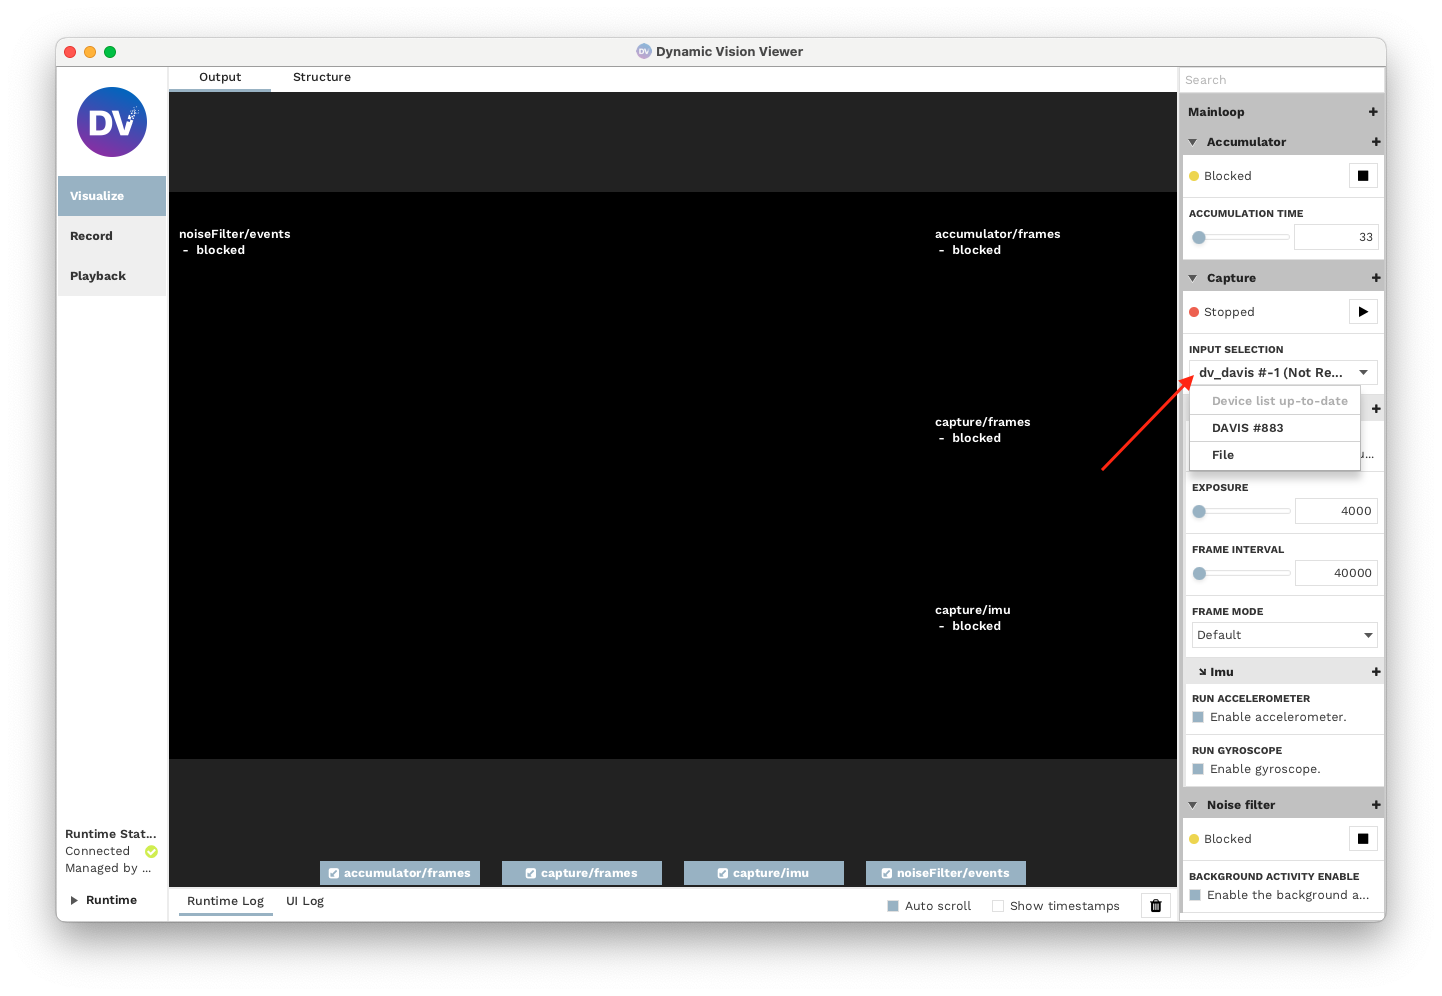
Live Camera
Select the preferred camera to visualize in the input selection in the Capture settings. As highlighted in the Figure below, you can find this option on the right side of the DV window. The visualization should start as soon as you select the correct camera.
Playback
If you want to visualize playback data from AEDAT4 format, select the File option and select the file you want to open. The visualization should start as soon as you select the correct file.
Adjusting Visualization Options
The default Visualize configuration comes with two software modules enabled by default:
A Noise Filter for the events output
An Accumulator for basic frame reconstruction from events
The settings for both of these modules can be found in the right-side configuration bar.
Example: Disable Accumulation Decay
By default, the accumulator module decays the contribution of old events over time as soon as new events for a pixel arrive. This is, by default, done in an exponential manner.
To switch decay off, click the + button next to Accumulator.
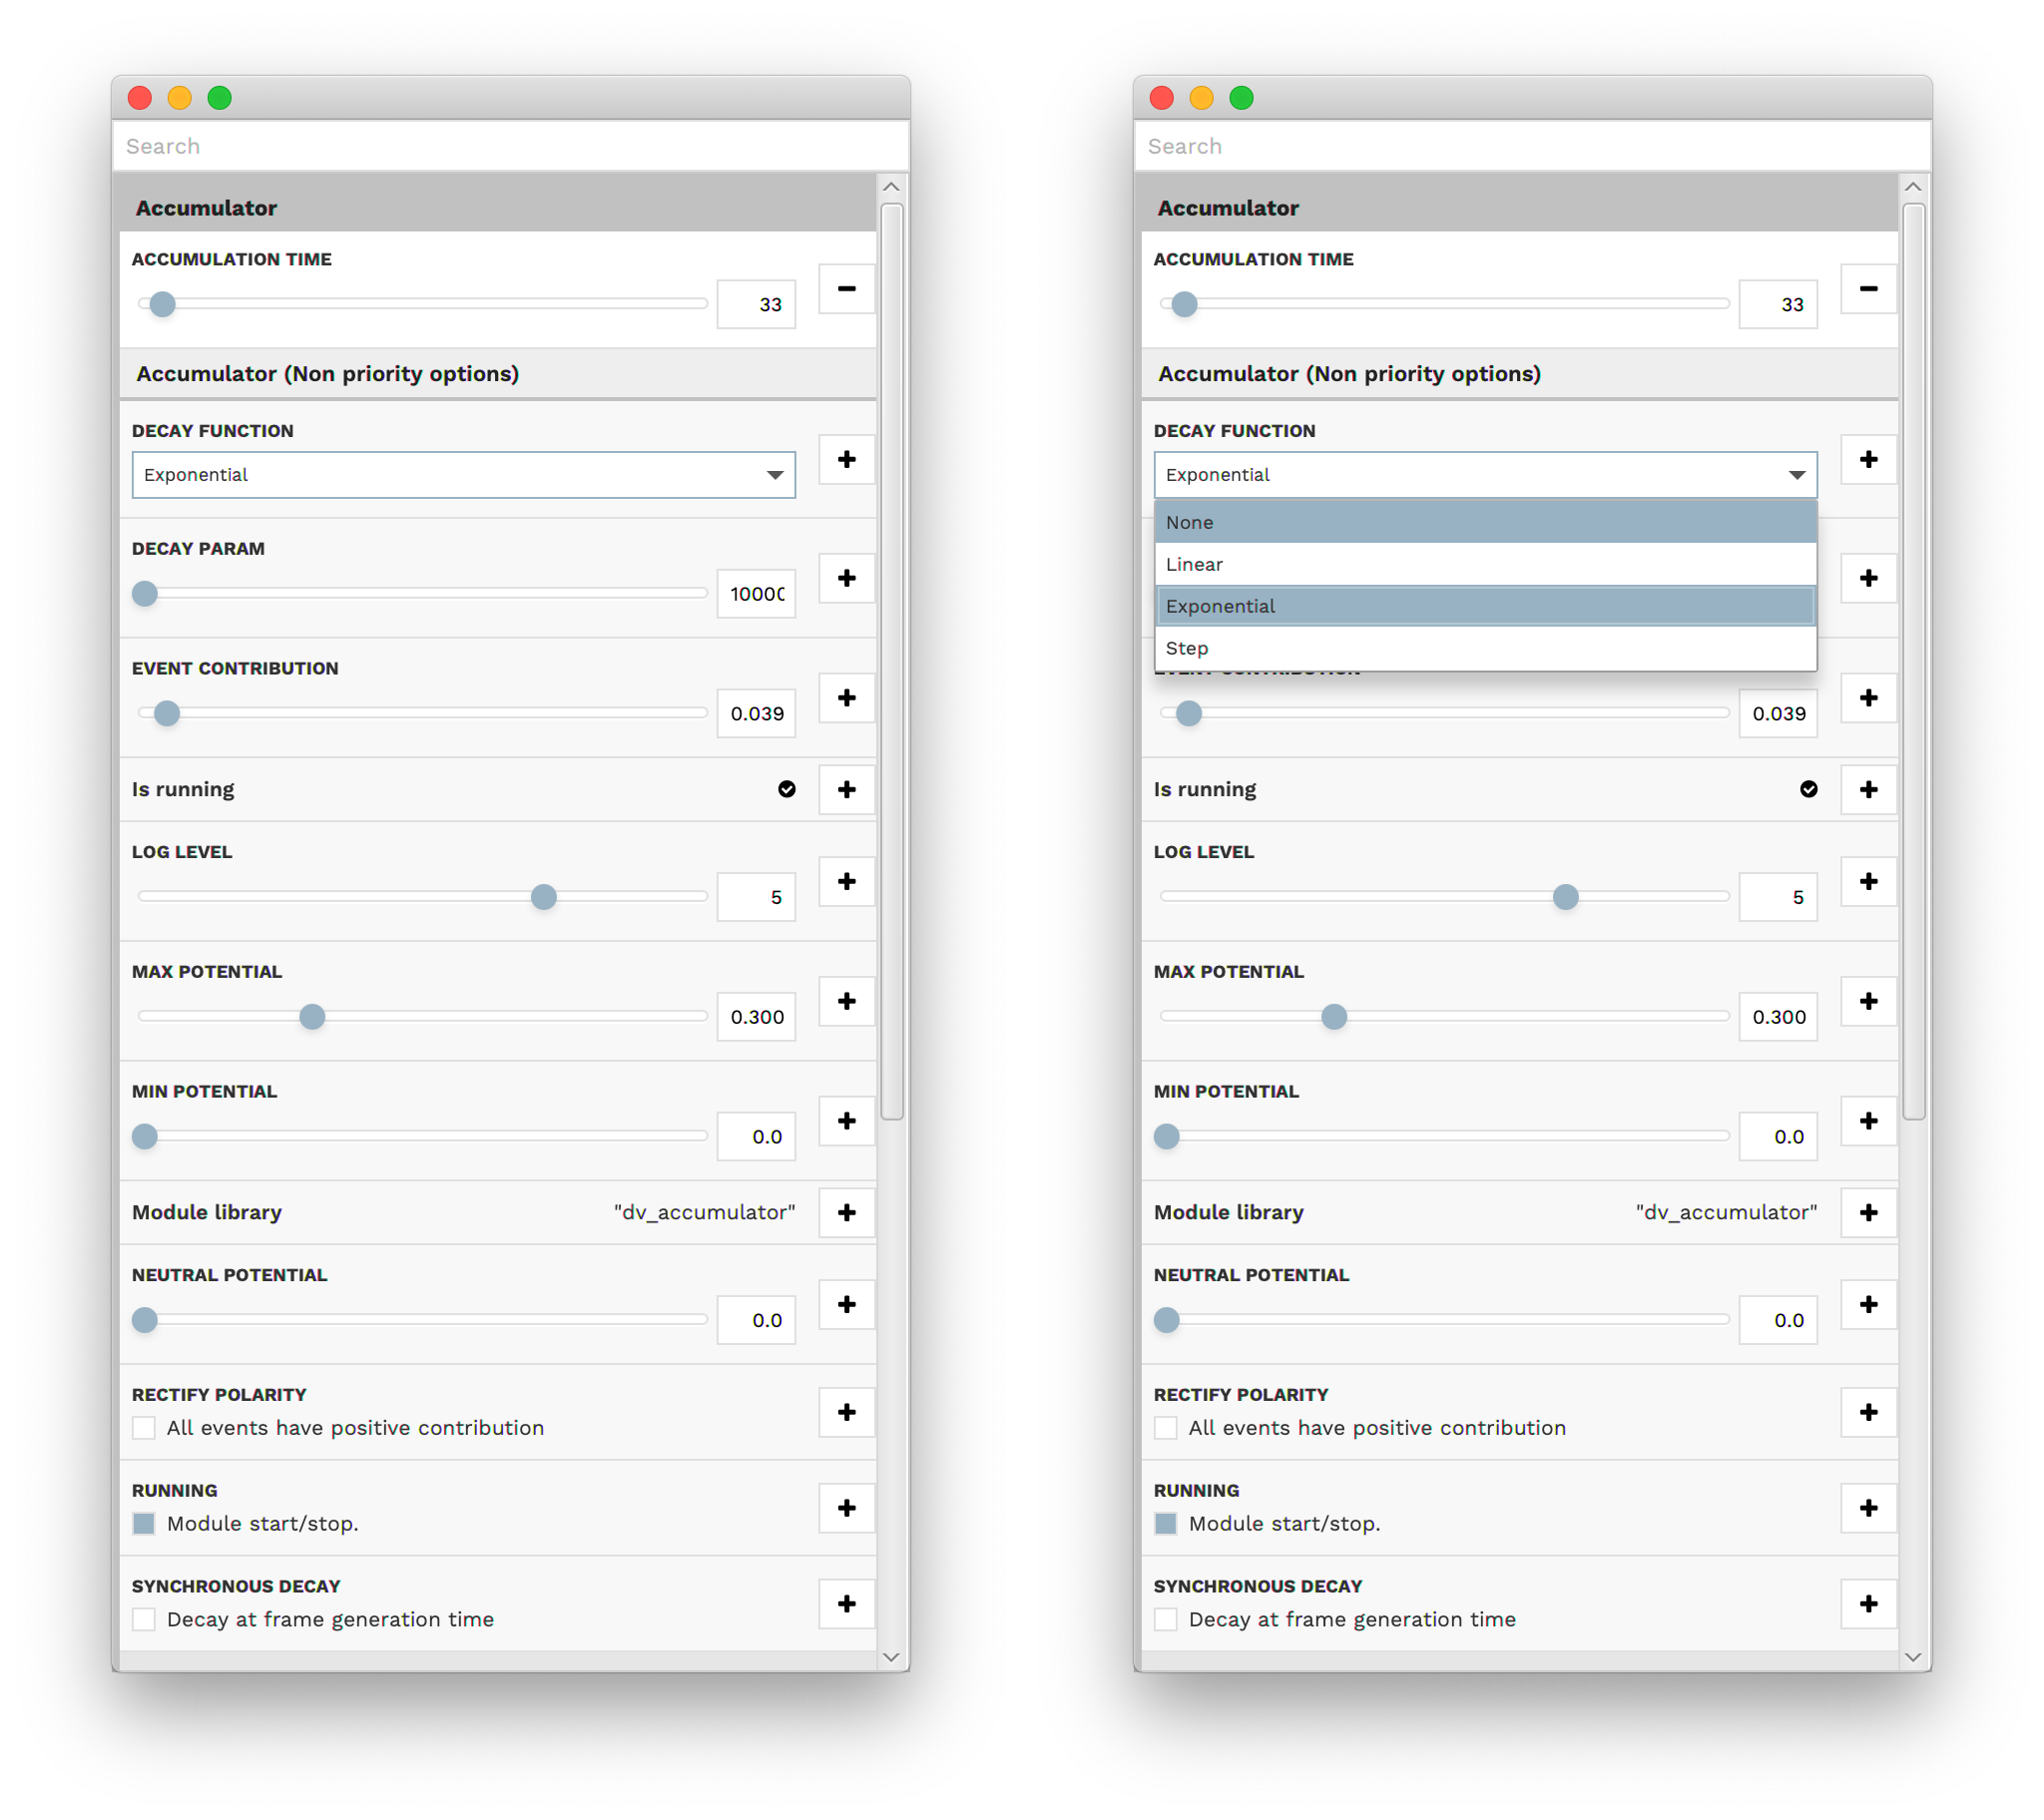
Switch the setting for the Decay function from Exponential to None. One can see that the accumulated image is a better representation of reality, but also accumulates more noise over time.